Exemplo de Upload com Spring Boot 3

Neste tutorial, você verá:
✔️ Spring Boot 3 com Thymeleaf para renderização da página.
✔️ Spring MVC para lidar com requisições de upload e remoção.
✔️ Armazenamento local das imagens na pasta uploads/.
✔️ Front-end responsivo com Thymeleaf para exibir e excluir imagens.
📌 Simplifique seu processo de deploy com o nosso painel ICP!
Hoje, eu vou te mostrar como criar um projeto simples em Spring Boot 3 para realizar upload de imagens para o servidor e usar em seu projeto.
📌 Passo 1: Criar o Projeto Spring Boot
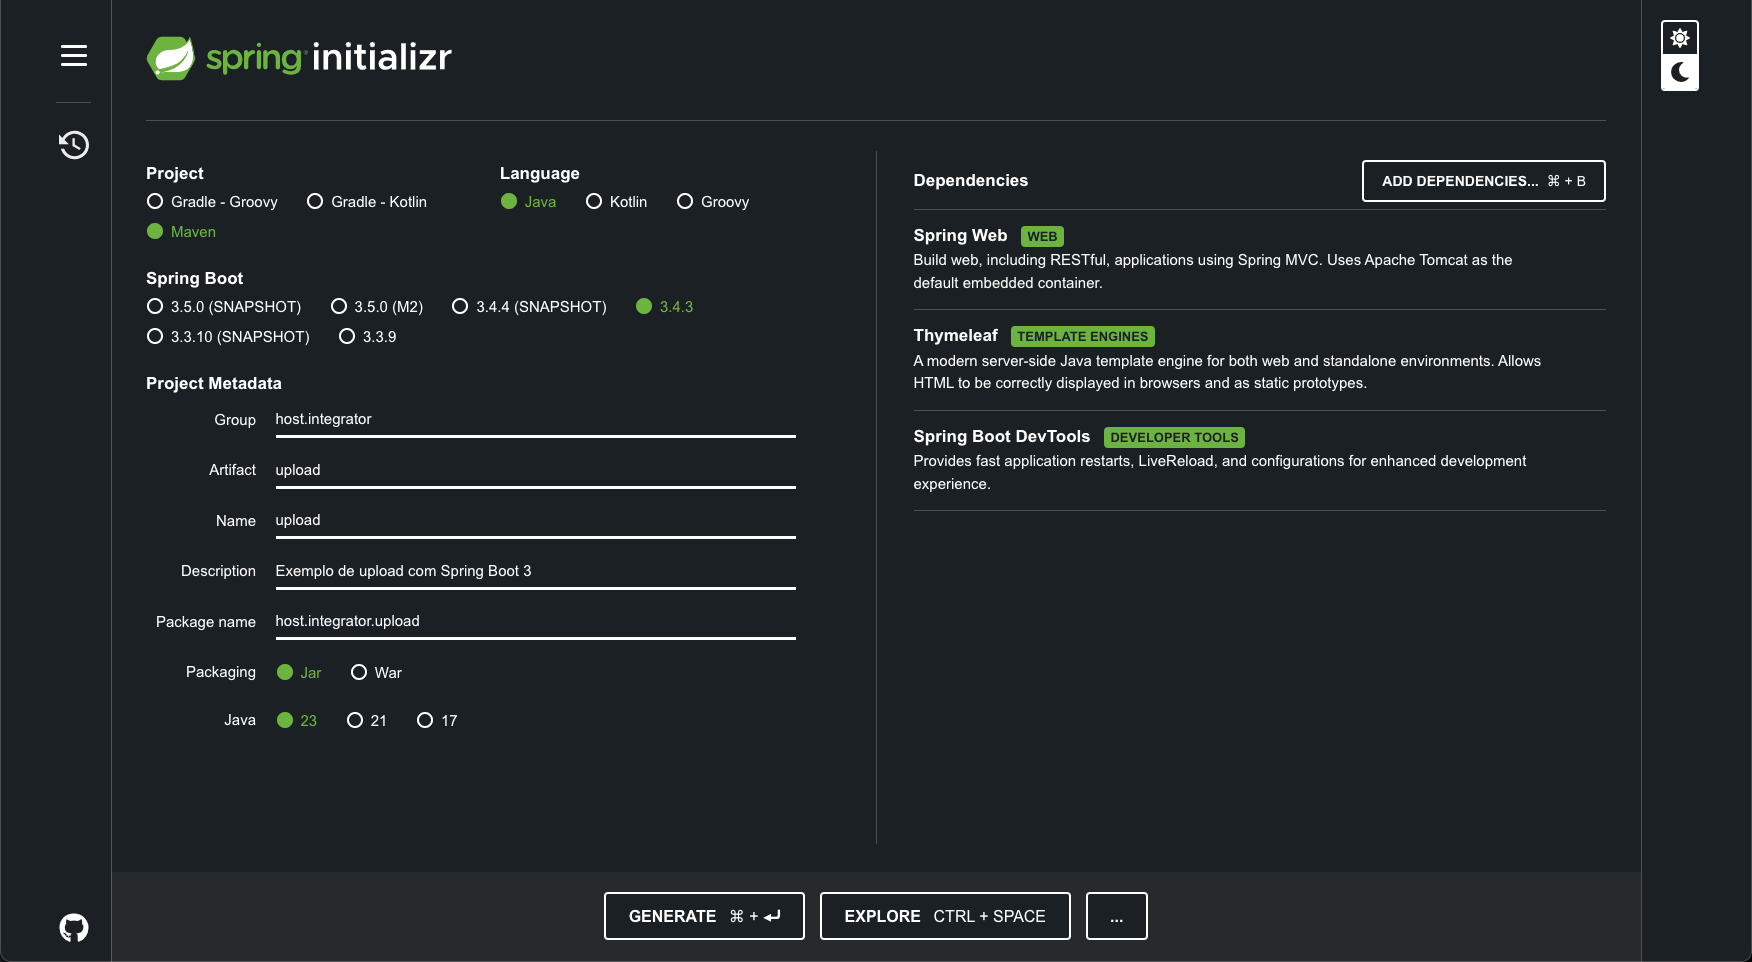
Crie um novo projeto Spring Boot 3 no Spring Initializr ( https://start.spring.io/ ) com as seguintes dependências:
- Spring Web
- Thymeleaf
- Spring Boot DevTools
📌 Passo 2: Estrutura do Projeto:
A estrutura do projeto ficará assim:
upload-springboot/
│── src/main/java/host/integrator/upload/
│   ├── UploadApplication.java
│   ├── controller/
│   │   ├── UploadController.java
│── src/main/resources/
│   ├── static/uploads/        # Pasta onde as imagens serão salvas
│   ├── templates/index.html   # Página com formulário e galeria de imagens
│── pom.xml
📌 Passo 3: Criar o Controlador
package com.example.upload.controller;

import org.springframework.stereotype.Controller;
import org.springframework.ui.Model;
import org.springframework.web.bind.annotation.*;
import org.springframework.web.multipart.MultipartFile;

import java.io.File;
import java.io.IOException;
import java.nio.file.Files;
import java.nio.file.Path;
import java.nio.file.Paths;
import java.util.Arrays;
import java.util.List;
import java.util.stream.Collectors;

@Controller
public class UploadController {

    private static final String UPLOAD_DIR = "src/main/resources/static/uploads/";

    // Página inicial com lista de imagens
    @GetMapping("/")
    public String index(Model model) {
        File uploadFolder = new File(UPLOAD_DIR);
        List<String> images = uploadFolder.exists() ?
                Arrays.stream(uploadFolder.list())
                        .map(filename -> "/uploads/" + filename)
                        .collect(Collectors.toList()) : List.of();

        model.addAttribute("images", images);
        return "index";
    }

    // Upload de imagem
    @PostMapping("/upload")
    public String uploadImage(@RequestParam("image") MultipartFile file) {
        if (!file.isEmpty()) {
            try {
                File uploadDir = new File(UPLOAD_DIR);
                if (!uploadDir.exists()) uploadDir.mkdirs();

                Path path = Paths.get(UPLOAD_DIR + file.getOriginalFilename());
                Files.write(path, file.getBytes());
            } catch (IOException e) {
                e.printStackTrace();
            }
        }
        return "redirect:/";
    }

    // Excluir imagem
    @PostMapping("/delete")
    public String deleteImage(@RequestParam("filename") String filename) {
        File file = new File(UPLOAD_DIR + filename);
        if (file.exists()) file.delete();
        return "redirect:/";
    }
}
📌 Passo 4: : Criar o Front-end com Thymeleaf
<!DOCTYPE html>
<html lang="pt-br">
<head>
    <meta charset="UTF-8">
    <meta name="viewport" content="width=device-width, initial-scale=1.0">
    <title>Upload de Imagens</title>
    <style>
        body { display: flex; flex-direction: column; align-items: center; font-family: Arial, sans-serif; margin: 20px; }
        form { display: flex; flex-direction: column; align-items: center; gap: 10px; }
        .gallery { display: flex; flex-wrap: wrap; justify-content: center; gap: 15px; margin-top: 20px; }
        .image-container { position: relative; }
        img { width: 150px; height: 150px; object-fit: cover; border-radius: 5px; }
        button { padding: 8px 15px; border: none; cursor: pointer; border-radius: 5px; }
        .upload-btn { background: blue; color: white; }
        .upload-btn:hover { background: darkblue; }
        .delete-btn { position: absolute; top: 5px; right: 5px; background: red; color: white; width: 25px; height: 25px; border-radius: 50%; font-size: 14px; display: flex; align-items: center; justify-content: center; }
        .delete-btn:hover { background: darkred; }
    </style>
</head>
<body>

<h1>Upload de Imagens</h1>

<form action="/upload" method="POST" enctype="multipart/form-data">
    <input type="file" name="image" accept="image/*" required>
    <button type="submit" class="upload-btn">Enviar</button>
</form>

<h2 th:if="${images.size() > 0}">Imagens Enviadas</h2>
<div class="gallery" th:if="${images.size() > 0}">
    <div class="image-container" th:each="image : ${images}">
        <img th:src="${image}" alt="Imagem">
        <form action="/delete" method="POST">
            <input type="hidden" name="filename" th:value="${#strings.substringAfter(image, '/uploads/')}">
            <button type="submit" class="delete-btn">X</button>
        </form>
    </div>
</div>

</body>
</html>
📌 Passo 4: : Execute o seu projeto e terá esse resultado
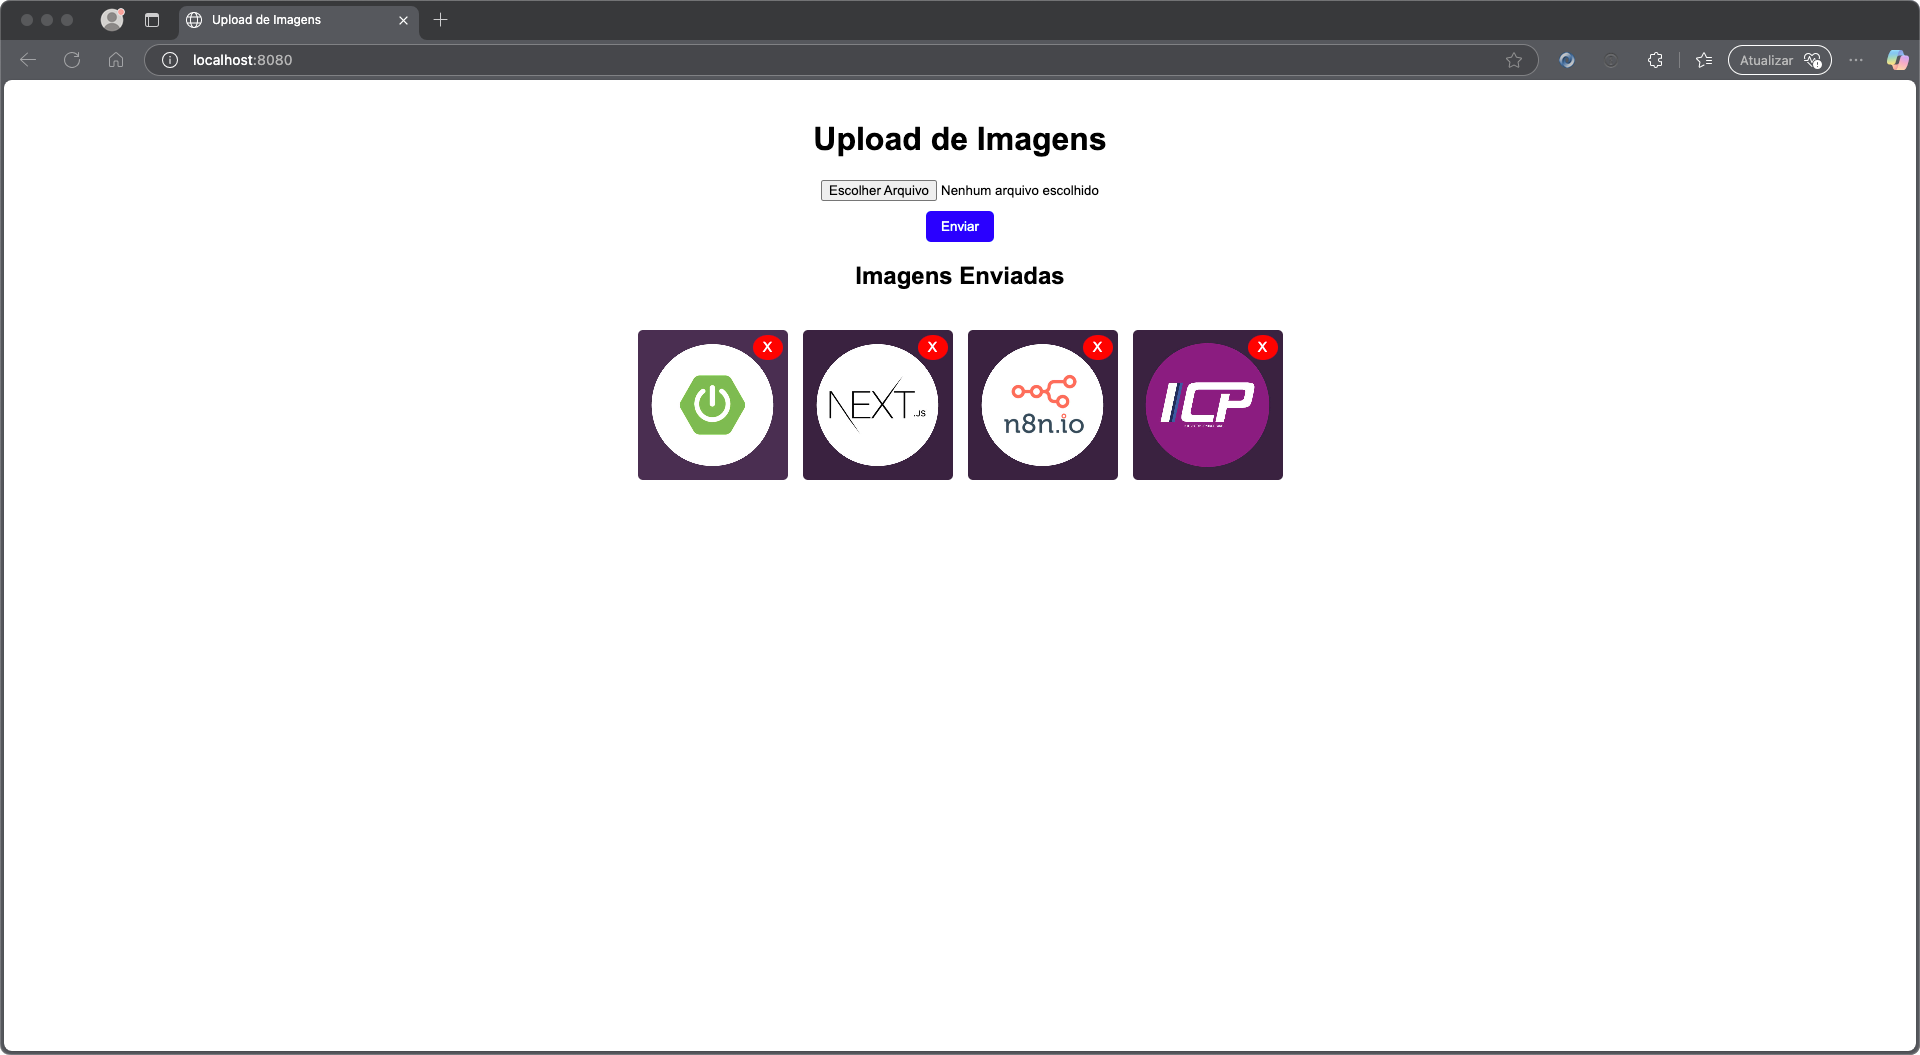
Valeu pessoal, até a próxima.